Replacing garage door springs can be tough, but it’s doable with the right help. If you’re thinking about doing it yourself, knowing the steps and safety tips is key. It’s important to learn how to replace garage door springs safely to avoid injuries and get it right.
Replacing garage door springs needs careful planning and doing. Knowing the basics of garage door spring systems and how to replace them safely will give you confidence. This guide will help you, whether you’re experienced or new to DIY projects, to replace garage door springs safely and successfully.
By following this guide, you can replace your garage door springs safely and efficiently. Always put your safety first when working with garage door springs. If you’re unsure about any part of the process, don’t hesitate to get professional help. With the right tools and knowledge, you can replace your garage door springs and have a safe and working garage door.
Introduction to Garage Door Spring Replacement
Key Takeaways
- Replacing garage door springs requires careful planning and execution
- Understanding garage door spring systems is essential for a safe replacement
- A diy garage door spring replacement can be done with the right guidance
- How to replace garage door springs safely is key to avoid injuries
- A garage door spring replacement should always prioritize safety
- Seeking professional help is recommended if you’re unsure about any aspect of the process
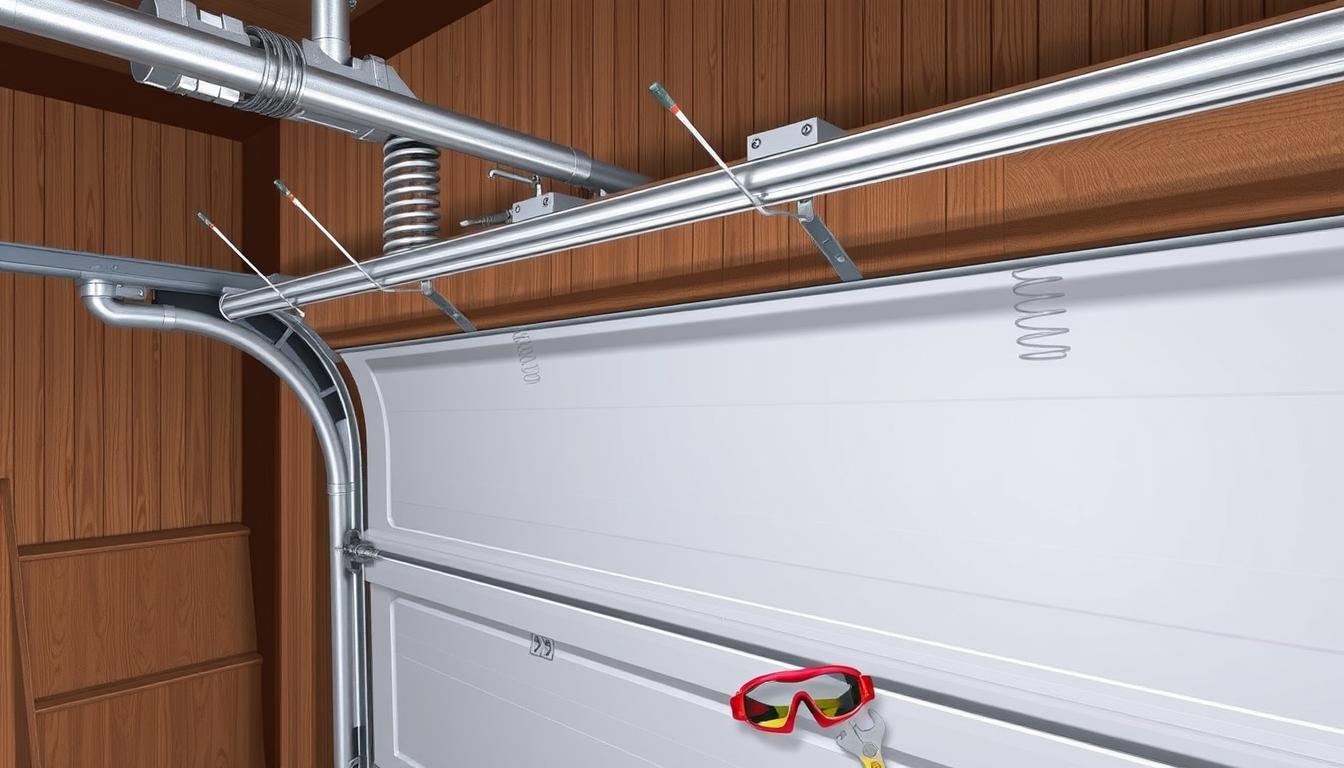
Understanding Garage Door Spring Systems
Garage door spring systems are key to your garage door’s smooth operation. They provide the tension needed to open and close it. There are two main types: torsion springs and extension springs. Each has its own role and characteristics.
Types of Garage Door Springs
There are different types of garage door springs. Torsion springs are usually found above the door. Extension springs are on the sides. Knowing about these can help you choose the right one for your garage.
How Springs Function in Your Garage Door
The springs in your garage door system store energy. This energy helps lift the door’s weight. When you open or close the door, the springs work to provide the needed tension. This is essential for the door to move smoothly.

Signs of Worn or Damaged Springs
It’s important to spot signs of worn or damaged springs. Look for uneven door movement, loud noises, or trouble opening or closing. Knowing these signs helps you keep your springs in good shape. This ensures your garage door works well and safely.
| Spring Type | Characteristics | Functions |
|---|---|---|
| Torsion Springs | Mounted above the garage door | Provide necessary tension to open and close the door |
| Extension Springs | Mounted on either side of the door | Assist in lifting the weight of the garage door |
Critical Safety Warnings Before You Begin
Replacing garage door springs can be dangerous if you don’t follow safety steps. It’s key to know the risks and take safety measures. This includes wearing protective gear and making sure the garage door is locked. Garage door spring safety tips help avoid injuries and make the process safer.
Before you start, consider these important safety tips:
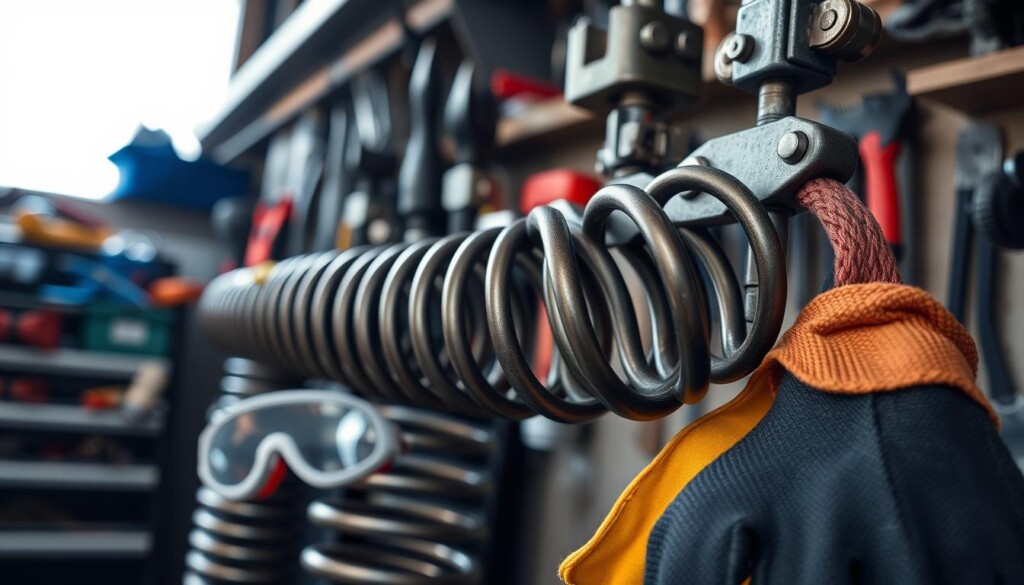
- Wear gloves and safety glasses for protection
- Make sure the garage door is locked to prevent accidents
- Be careful of the spring’s tension to avoid getting hurt
By following these critical safety warnings and precautions, you can replace the springs safely. Remember, garage door spring safety tips are key to avoiding risks.
Always put safety first when working with garage door springs. If you’re not sure or feel uneasy, it’s best to get professional help.
| Safety Precaution | Description |
|---|---|
| Wearing protective gear | Wearing gloves and safety glasses to prevent injury |
| Securing the garage door | Ensuring the garage door is properly secured to prevent it from falling |
| Awareness of spring tension | Being aware of the spring’s tension and taking necessary precautions to avoid injury |
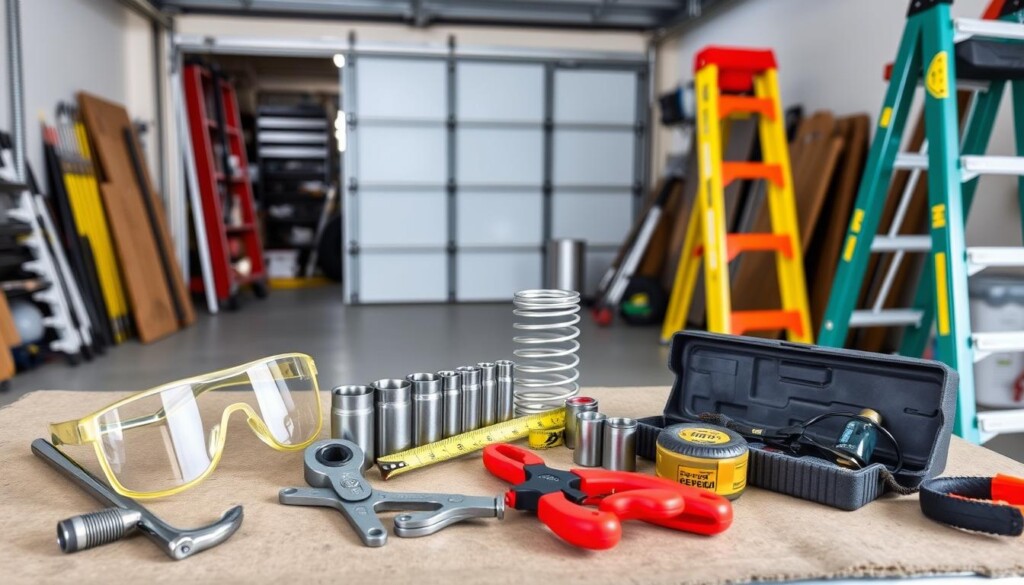
Essential Tools and Materials Needed
Replacing garage door springs needs the right tools and materials for safety and success. Having the essential tools for garage door spring replacement is key to avoid accidents or damages. The necessary tools list includes a wrench, pliers, and a tape measure. These are used to remove the old springs and install the new ones.
Before starting, it’s vital to have safety gear like gloves and safety glasses. Measuring and purchasing new springs is also critical. Wrong springs can cause safety issues. Here are some tools and materials you’ll need:
- Wrench
- Pliers
- Tape measure
- Gloves
- Safety glasses
- Ladder
Remember, the process might need more tools and materials based on your garage door and springs. Always check the manufacturer’s instructions or get professional help if unsure.
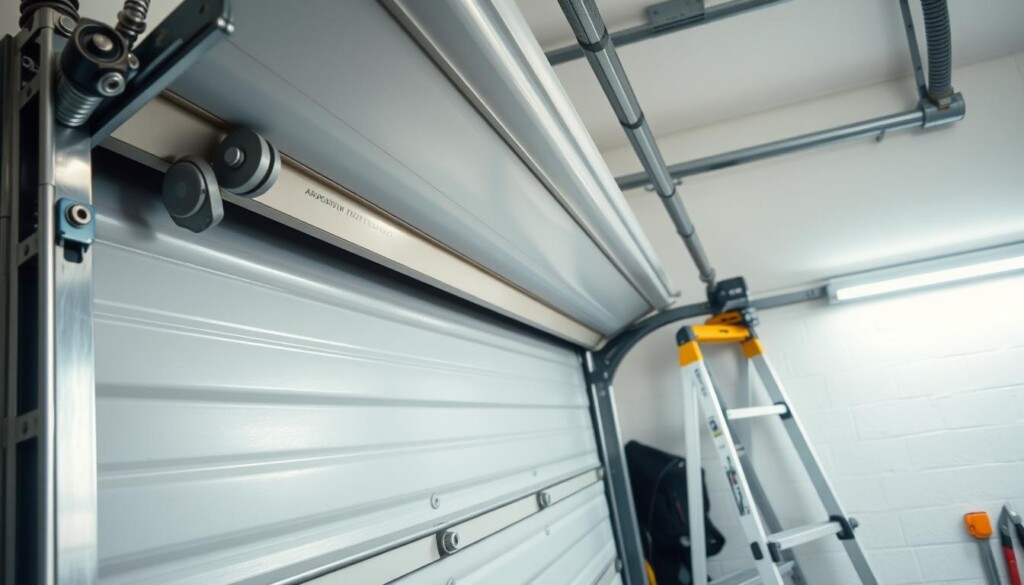
Preparing Your Garage Door for Spring Replacement
Before you replace your garage door springs, you need to get your door ready. This means disconnecting the garage door opener and making sure the door is stable. Getting your garage door ready for spring replacement makes the process safer and smoother.
Here are some important steps for garage door preparation:
- Disconnecting the garage door opener to prevent accidental opening or closing
- Securing the door in place using clamps or locking pliers
- Removing any obstacles that may interfere with the replacement process
By following these steps, you can make sure your garage door is ready for spring replacement. This helps avoid dangers and makes the replacement go well. Always put your safety first when working with garage door springs. If you’re not sure about anything, it’s best to get professional help.
| Step | Description |
|---|---|
| 1 | Disconnect the garage door opener |
| 2 | Secure the door in place |
| 3 | Remove any obstacles |
How to Replace Garage Door Springs Safely: Step-by-Step Process
Replacing garage door springs can be tough, but a guide can help. It ensures a safe and successful job. First, lock the door to avoid accidents.
Securing the Door
Lock the door with clamps or locking pliers. This keeps it from moving while you work.
Removing Old Springs
With the door locked, remove the old springs. Disconnect them from the door and track. Then, pull them out carefully.
Here are the steps to follow:
- Disconnect the springs from the door and the track
- Remove any clips or brackets holding the springs in place
- Carefully pull the springs out of the system
Installing New Springs
Now, install the new springs. Connect them to the door and track. Adjust the tension to balance the door.
By following this guide, you can replace garage door springs safely. Always prioritize your safety. If unsure, get professional help.
| Step | Description |
|---|---|
| 1 | Secure the door in place |
| 2 | Remove the old springs |
| 3 | Install the new springs |
| 4 | Test the tension |
Proper Spring Tension Adjustment Techniques
Adjusting the spring tension is key for your garage door’s safety and smooth operation. Proper spring tension adjustment needs careful attention and a good understanding of the techniques. Always check the manufacturer’s instructions and follow their steps.
Adjusting the spring tension means tightening or loosening it to the right level. You’ll need tools like a wrench or a torsion spring winding bar. It’s important to be careful, as wrong tension can cause safety problems and affect the door’s performance.
To use the right spring tension adjustment techniques, follow these steps:
- Consult the manufacturer’s instructions for specific guidance on adjusting the spring tension.
- Use the recommended tools to avoid damaging the springs or other components.
- Test the garage door’s operation after adjusting the spring tension to ensure it is functioning smoothly and safely.
| Spring Type | Tension Adjustment |
|---|---|
| Torsion Spring | Use a torsion spring winding bar to adjust the tension. |
| Extension Spring | Use a wrench to tighten or loosen the spring. |
By following the proper spring tension adjustment techniques and using the right tools, you can make sure your garage door works safely and well. Always check the manufacturer’s instructions and be careful when working with springs and other parts.
Common Mistakes to Avoid During Replacement
Replacing garage door springs can be tricky. It’s easy to make mistakes that can be dangerous or mess up the door’s performance. Knowing the common mistakes helps ensure a safe and successful replacement. One big mistake is setting the spring tension wrong, which can make the door not work right or even cause accidents.
It’s also important to avoid installation errors to make sure the garage door works right and safely. Mistakes like picking the wrong spring size, not aligning springs right, or not tightening them enough are common. To avoid these, always follow the manufacturer’s instructions and take safety steps.
Don’t overlook safety oversights to prevent accidents and injuries. Common oversights include not wearing protective gear, not securing the door, and not checking the door after replacing springs. Knowing these risks helps you replace springs safely and successfully.
Installation Errors to Watch Out For
- Incorrect spring sizing
- Improper spring alignment
- Insufficient tightening of springs
By avoiding these common mistakes and taking the right precautions, you can replace garage door springs safely and effectively.
Testing Your Newly Installed Springs
After putting in new garage door springs, it’s key to test them. This makes sure they’re working right. You need to do a balance check and an operation test to see if the door moves smoothly and safely.
A balance check helps make sure the door is aligned and balanced. You can do this by taking the garage door opener off and lifting the door by hand. If the door doesn’t move, it means the springs are balanced right.
An operation test checks how the door moves. You should make sure it opens and closes smoothly.
Balance Check Procedure
- Disconnect the garage door opener
- Manually lift the door to the middle point
- Release the door and observe if it stays in place
Operation Test Procedure
- Reconnect the garage door opener
- Open and close the door several times to check for smooth movement
- Listen for any unusual noises or vibrations
By doing these steps, you can make sure your new springs are working well. This keeps your garage door safe and efficient. Always put safety first when checking and fixing your garage door springs.
| Test | Procedure | Expected Result |
|---|---|---|
| Balance Check | Manually lift the door to the middle point | Door stays in place |
| Operation Test | Open and close the door several times | Smooth movement, no unusual noises or vibrations |
Maintenance Tips for Extended Spring Life
Regular garage door spring maintenance is key to making your springs last longer. It also helps avoid the need for early replacement. By using simple maintenance tips for extended spring life, your garage door will work smoothly and safely.
To keep your garage door springs in good shape, start by lubricating them often. This cuts down on friction and wear, making them last longer. Also, check your springs for rust or corrosion and replace them if needed.
Here are some important maintenance tips for extended spring life to remember:
- Check the spring tension regularly to ensure it is properly adjusted
- Lubricate the springs every 3-6 months to reduce friction
- Inspect the springs for signs of wear and tear, such as rust or corrosion
By following these easy garage door spring maintenance tips, you can extend your springs’ life and avoid expensive repairs. Always put safety first when working with your garage door springs. If you’re unsure about maintenance, it’s best to get help from a professional.
Regular maintenance is essential for your garage door springs to last as long as they can. By following these maintenance tips for extended spring life, you can avoid early replacement. This keeps your garage door safe and efficient.
When to Call a Professional Instead
Replacing garage door springs can be a DIY project. But, there are times when it’s better to call a pro. This is true for high-risk situations, like dealing with high-tension springs or complex door setups.
High-Risk Situations
There are some situations where you should call a professional for garage door spring replacement. These include:
- Dealing with high-tension springs that can cause injury if not handled properly
- Complex door configurations that require specialized knowledge and tools
- Spring replacement in high-traffic areas or commercial settings where safety is a top priority
Complex Door Configurations
Some garage door setups are more complex than others. They need professional help for safe and proper spring replacement. These setups might include:
| Configuration | Description |
|---|---|
| Multi-spring systems | Require specialized knowledge to ensure proper tension and balance |
| Custom door designs | May require custom springs or specialized installation techniques |
Troubleshooting Post-Installation Issues
After you replace your garage door springs, you might face some problems. These can include issues with how the door moves, the spring’s tension, or safety features. Garage door spring troubleshooting is key to fix these problems. First, check if the door is balanced and if the springs are correctly set.
Some common problems are uneven door movement, loud noises, or trouble opening and closing the door. To fix these, try adjusting the spring tension or look for any blockages in the door’s path.
Here are some steps to follow for troubleshooting post-installation issues:
- Check the door’s balance and alignment
- Adjust the spring tension as needed
- Inspect the door’s tracks and rollers for any obstructions
- Test the door’s operation and make any necessary adjustments
By following these steps, you can find and fix any problems after installing new garage door springs. Always keep safety in mind when working with garage doors and springs. If you’re not sure about anything, it’s best to get help from a professional.
| Issue | Cause | Solution |
|---|---|---|
| Uneven door movement | Improper spring alignment | Adjust the spring tension and realign the springs |
| Loud noises | Worn or damaged rollers | Replace the rollers and lubricate the tracks |
| Difficulty opening and closing the door | Obstructions in the door’s path | Clear any obstructions and adjust the door’s alignment |
Conclusion
Replacing your garage door springs can be rewarding if you know what to do. This guide has shown you how to do it right. You’ll keep your garage door working well for many years.
Always put safety first. If you’re unsure or see a risk, get help from a pro. This ensures your safety and the job’s success.
Now that you’ve replaced your garage door springs, feel proud of yourself. You’ve saved money and time. You’ve also improved your home’s garage door system.
With the right tools and a bit of patience, you can do more upgrades. Enjoy the results of your hard work!
FAQ
What are the different types of garage door springs?
Garage door springs come in two types: torsion and extension. Torsion springs sit above the door. Extension springs are on the sides.
What are the signs of worn or damaged garage door springs?
Worn or damaged springs show in several ways. The door might be hard to open or close. It could drop suddenly. You might see cracks or breaks in the springs.
What safety equipment is required when replacing garage door springs?
Safety is key when replacing springs. You’ll need gloves, safety glasses, and a ladder. Make sure the door is locked before starting.
How do I measure and purchase the correct replacement springs?
Measuring springs correctly is important. You need to match the size and weight for your door.
How do I properly adjust the tension on the new springs?
Adjusting spring tension is critical. Follow the manufacturer’s guide to ensure the door works right.
What are some common mistakes to avoid when replacing garage door springs?
Avoid installation errors and safety mistakes. Use the right tools and follow instructions carefully.
How do I test the newly installed springs to ensure they are working properly?
Test the springs after installation. Check the door’s balance and operation. This confirms the springs are working right.
When should I call a professional instead of attempting to replace the springs myself?
Call a pro for high-risk situations or complex doors. They have the right skills and tools.
What are some common troubleshooting steps if I encounter issues after the spring replacement?
Troubleshoot post-installation problems. Check the door’s operation, spring tension, and safety features. Use a guide to find and fix issues.
Written by ASK
